Thursday, September 26, 2013
Listening is important. Collaboration is important. Writing is important.
Dictoglosses combine all of these these things to keep students' brains working in a foreign language.
What is a dictogloss?
I am glad you asked :) Dictoglosses are essentially dictation exercises where students work together to recreate a text. The process is normally as such:
The teacher reads a text. Students listen. They do not take notes. They just listen.
The students INDIVIDUALLY write down as much of the story as they can remember. They can use pictures, abbreviations, other words, blanks or anything else that will help them if they don't recall the specifics.
(optional) The text is read again. Students do NOT write while the teacher is speaking. When the teacher finishes, they make changes as needed to their version. (I prefer to skip this step and go straight to 4, but some teachers find their classes don't have much to share unless this step is used. You know your classroom best so do what you think will work!)
The students pair up with a friend and together try to combine their versions to get the version as close to the original as possible.
Students put down their pens and the teacher reads the text one last time.
The students get a few more moments to write their final version (if you as a teacher want you can combine pairs at this point to make a group of 4 working together on the final version).
If you want you can have the students write the final version on butcher paper and everyone posts it on the board. Then give students time to circulate and mark any mistakes they see (misspelled words, bad punctuation etc.) I find the faster way is to have them pass the paper to the right/left and then the teacher reads the reading again and they correct the paper.
I usually give the team with the fewest mistakes a prize of some sort (bonus points, free homework passes, etc.)
So now that we know the basics. How do make this fun?
SONGS Well, part of it means that you have to pick fun texts! Use a song! Yes, I know that I love to use songs whenever possible but it can be fun. Break out lyrics (and have them listen to the song to reveal the answers). You shouldn't use a full song unless it is really an upper level class. If they are fairly advanced though you don't even need to speak. Just play the chunk of the song, (something slower and older the students won't know. The first 30 seconds or one minute of Jill Sobule's "Lucy at the Gym" is a good example; the first 20 seconds of "It makes me ill" would not be advised. I find punctuating these is usually the hardest part!
DRAW AND TELL With lower students tell a draw and tell WITH the picture, and keept the picture up! Stories tend to follow a logical progression more than a speech or tongue twister. Since they are lower level the visual will also help them remember the story and vocabulary used. Just be sure to remember to keep it short! You could also differentiate by passing out the picture to certain students and not to others. More on Draw and Tells here.
MOVIES/TELEVSION Again, keep the level of the student in mind. You don't want to use Rock, Paper, Lizard, Scissors, Spock from The Big Bang Theory. The first minute (actually I'd keep it at the first 20 seconds) of the Hitchhikers Guide the to Galaxy is better. You could use the audio from the movie, or recite it yourself. Be careful of accents, background noise, and audio that requires students to see something to understand it.
TED TALKS / NPR / SPEECHES Get authentic speech in here! TedTalks could work. Why not try the first 39 seconds of this one. Use an acceptance speech from MTVs Video Music Awards (because many students care more if Taylor Swift says it than if you say it). These can be helpful when practicing idioms and other things that don't often come up in artificial texts. These can be very difficult if the person is a fast talker, or there are lots of proper nouns. I LOVE Peter Dinklage for example, but his recent Emmy acceptance speech has some names student may struggle with. I may tell them to just use initials or write the names on the board to help them out with that part.
TONGUE TWISTERS / BRAIN TEASERS Tongue Twisters can be fun for advanced students and brain teasers have the added bonus of letting students who finish quickly try to solve them. These also tend to be super short. Tongue twisters have the advantage of being used to differentiate sounds (especiall minimal pairs). Try to start with something like, "She sells sea shells by the sea shore" and then move onto something longer like, "Betty bought some butter 'But,' she said, 'this butter's bitter. If I put it in my batter, it will make my batter bitter, but a bit of better butter, better than the bitter butter will make my bitter batter better.' So she bought a bit of better butter, Better than the bitter butter, and made her bitter batter better.
So there you go 5 ways to make dictoglosses a bit more fun! Do remember to aim the text at your learners. Stories are easier than texts which don't follow a logical progression. Keep in mind accents, vocabulary, etc. To make them even more effective try to use texts or audio that have grammar points you have recently covered. The Hitchhikers Guide to the Galaxy and Lucy at the Gym both have transition words for example.
- See more at: http://eslcarissa.blogspot.com/2012/09/5-fun-ways-to-use-dictagloss-in-efl.html#sthash.2rCEnF1l.dpuf
Wednesday, September 25, 2013
Re: Scaffolding (draft)
by Tea Khachoshvili - Wednesday, 25 September 2013, 1:27 PM
I have considered your suggestions and questions and have modified my session plan a bit. I have skiped some activities and I have wrttien another draft. I hope you will read it again and write to me your feedback again.
Objective is the same.
Stage 1: "Get to know" activity" (It has not been changed)
Objective: Ps will get to know each other and this activity enables us to make cooperative and comfortable atmosphare.
Time: 10 mn
Stage 2: Warm up/brainstorming:
activity|: T. reads a story ( A toddler was learning to walk.As she took her first tentative steps, her father walked behind her, holding both hands above her head as she awkwardly lurched forward.As she gained confidence, the father held only one hand,walking to the side,keeping an eye out for toys and other objects that could trip her. After awhile, he let go but continued at his daughter's side to catch her if she fell.When the child became tired or the terrain got bumpy, Dad grabbed her hand to make sure she didinot fall and skin a knee.Eventually, his daughter both walked and ran on her own. (Adapted from Cazden,1988)) Then T. asks Ps. some questions: e.g which teaching strategy this story come with; what is saffolding what theory is foundation of this strategy.what is the main concept. And they shoul guess about the session topic.
Then Ps. watch a video which answers all these questions.
Objective of this activity: Ps. will be able to remind "Vigotsky and his the socio cultural theory and the strategy . The video will enable them to compare their anwer and get more information.
Time: 15mn
Stage 3: presentation "How to saw on a button"
activity: Ps. saw on abutton with trainer instructions. Then they should repeat these instructions.
Objective of this activity:it is more easy to aware how to use scaffolding instructions from their real life. .
Time: 10mn
Stage 4: Micro teaching "how to teach A-a; B-b to young learners
Activity : Ps. work in groups and think about one technic how to teach them and then present this one.
(I have one technic and I will show or present it. This has been written in one of my reply)
Objective: Ps. will share one technic from their experience and practice
Time: 5mn
Stage 5: Writing a lesson plan and objective is " Ss will be able to write letters C-c and D-d. "
class - I (lesson is 35mn)
Activity: Ps. work in groups and then present their plans
Objective: Ps will be able to use scaffolding and its instructions in the lesson plans.
Time: 10 mn
Stage 6-Reflection: the same which I have written.
Time ; 10 mn
I am looking forward your another feedback.
Thanks
Tea
Hello my colleagues
I have written a draft of my session plan and I hope you will read it and give me important and useful feedback
Objective: Particioants wii raise awareness how to use scaffolding instructions in the lesson plans.
Stages:
I. "Get to know" activity. 1. introduce myself with my profile. (write my name on the paper and draw some pictures or figures about my life and expectations and participants should guess what they mean. 2. they should the same, go round the room and try to guess each other's profile.
II. divide them in three groups. (according to their months of birth|)
III. Reflection : what they know or remember about scaffolding
I will read a story (this story is written on the power point ) "how a toddler learn to walk" and they should guess which teaching strategy it comes with.
IV. Brainstorming: Participants should ask some questions: 1. What theory is the foundation of scaffolding; 2.who is the founder and what they know about him; 3.what is the main concept of this theory. (after each answer I will show them my presenation about these questions). Then I will show a five minute-video ( I have downloaded it)
V. After watching this video, they should answer and discuss some questions: 1. what they saw; 2.what they know and not know about scaffolding. 3. why is scaffolding important for the teaching process.
VI. Introduce the topic: one example from real life how to use scaffolding instructions. I "teach" them "How to saw on a button" . Then, questions: 1.what and how they have done. 2.why I have done this activity
VII. I will make a power point presentaion about scaffolding instructions.
VIII. Participants should think how they teach young learners e.g. A-a; B-b (each group presents their ideas)
IX. I will distribute one lesson from the students' textbook and write the general objective on the board and the participans shoul write a lesson plan. Then volunteers from each group present their lesson plans
X. Reflaction: questions: 1. what stages were of this session; (I will write their answers and then they should classify in the chart: Instructor does it:
class does it:
group does it:
individual does it:
2. what they learnt
3. why the scaffolding and its instructions important for the learning and teaching process.
(Participant think the answers and discuss them and then say ones. )
I am looking forward to your feedback, they are imporatan for me as usual.
with love
Tea
Thanks
Monday, September 23, 2013
Lesson plan 23.09.2013 class III
Objective: I. By the end of the lesson students will be able to classify the words into two parts: 1. Parts of the body;
2. Parts of the house (garden;bathroom; door; stairs; kitchen; window; foot; hand; hair; arm; leg; nose.)
II. By the end of the lesson students will be able to write new words-parts of the body (foot; feet; hand; hair; arm; leg; nose.)
At the begining: Checking homework (workbook-pg 52; ex.1;2) (10mn) Students read them.
Activity 1. Teacher shows the flashcards: the parts of the house (garden; door; stairs; kitchen; window; )
Studsents guess the pictures and say the words in English.(Teacher helps to guess with simple sentences: we wash our hands in the....we cook our food....teacher uses miming ) (5mn)
activity 2. Students do the ex. 1 pg.53(workbook) (5mn)
Activity 3. Stydents are divided into four groups. Teacher distributes some strips of paper with the words:parts of the body and parts of the house and the students should classify them under the main sentence. Then they say these words and teacher writes their answers on the board.(10mn)
Activity 4. Students copy these words in their exercise-books. (to practise the words) (5mn)
Activity 5. Dictation. Teacher dictates the new words and check (8mn)
Homework: Teacher gives the students some instructions. Ss. make up simple sentences using new words. e.g. I have a .....; It is a.....(2mn)
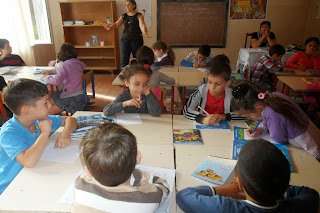
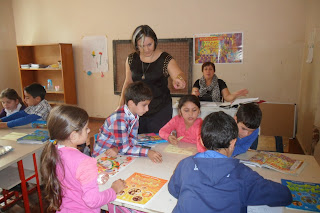
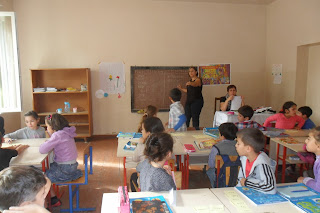
Photos of the lesson


Wednesday, September 18, 2013
Subscribe to:
Posts (Atom)